This article is intended to supplement the courses offered by HyperionDev. Whilst they can be used on their own if you’re interested in getting your own development environment set up, some of the steps mentioned are specifically for those taking our C++ courses. On that note, if you haven’t already, why not sign up for one of our courses? (Full-time students learn for free!)
This tutorial will help you set up your C++ development environment, which consists of an Integrated Development Environment for C++. This IDE allows you to write, compile and run C++ code. Unlike Python or Java, for Windows, the core C++ language files and libraries come packaged together with the IDE (in our case Dev C++) so you’ll only need to install a single program to get the full debug and coding features provided by the language. You can use an alternative compiler if you’d like such as Clang or Cygwin, but the easiest way to get going fast is to let Dev C++ handle the grunt work for you.
Note: If you’re not on Windows, read on to find out how to set up your C++ development environment.
If you’re already taking a course with us or even if you’re reading for interest, follow the instructions below as written to fire up C++ on your PC.
Instructions

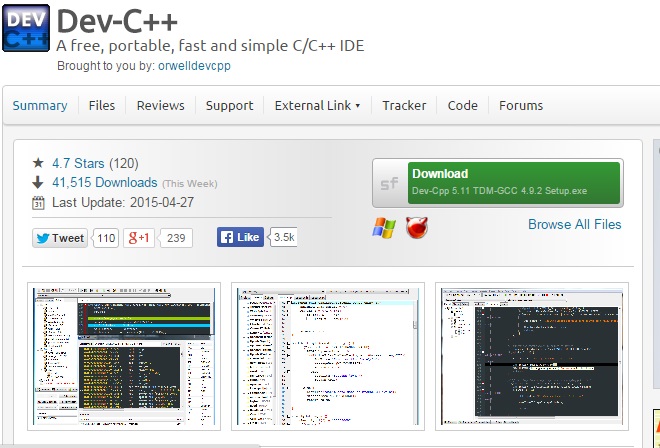
- All you need to do is head over to SourceForge, where Orwell’s Dev C++ client is located.
- Click the green download button to get the setup files for Dev C++ and follow the installation instructions. It’s as simple as that
If you’re not on Windows:
We recommend downloading Code::Blocks, a full-featured IDE which automates the below process. Download and install it from here. If you’d like to code and compile manually, follow the steps below.
- Most distributions of Linux actually come with the core C++ language and compiler pre-installed. We’ll consider Ubuntu, which uses gcc to compile your C++ code.
- To access Linux’s C++ compilers, use your favourite text editor (such as gedit) to open the file you’d like to run (usually has a “.cpp” extension).
- Open your Ubuntu Terminal and change directory to the location of your “.cpp” file. (click here to learn how)
- Execute gcc /o <executable_filename> <yourcode>.cpp where <executable_filename> is the name of the file created upon compiling your code which you’ll run, and <yourcode> is the name of the file with your C++ code.
- To run your code execute gcc /<executable_filename>
That’s it! You’re all ready to get started developing in C++. Comment on this tutorial if you’re having problems or if you’re taking a course with us, the Portal has details of your trainer should you need help.
Author: Matthew de Neef
Date originally published: 24/03/16

