This tutorial will guide you through the steps of virtualising Ubuntu within your current Windows installation. (If virtualisation is new to you, Get the low-down on the concepts here)
VirtualBox – the free choice
There are a number of great virtualisation packages on the market. Oracle’s VirtualBox takes the cake because it’s free, compatible with Mac, many Linux distros and Windows hosts, and supports basically any OS you can think of as a guest. This tutorial shows you how to install and configure VirtualBox on Windows and how to install an Ubuntu 14.04/15.10 VM using VirtualBox. (Readers of our Ubuntu tutorial, this one is for you!).
- Download the Ubuntu of your choice from the site . The “LTS” edition is somewhat older, but is supported longer and can be more stable than the latest release. Choose 64-bit unless you’re running a PC with 2GB or less of RAM.
- Download and install the VirtualBox client that’s applicable for your OS. On the download site, choose the “VirtualBox for Windows hosts” link to get the installer. Once you’ve installed, launch the VirtualBox application, and you’ll see a UI similar to the one below (except yours will be empty!).

The VirtualBox UI.
- Now we’ll create a virtual machine. Click the blue “New” star and you’ll be presented with the Create Virtual Machine dialogue. If you see the screen below, choose the “Guided Mode” button and move to the next step.

The Expert Mode VirtualBox UI
Choose Guided Mode here.
- We’ll be asked to enter a VM name and choose what OS and type it is. VirtualBox is generally intelligent this way — it’ll detect the name you give the VM and try to infer the OS from that. For Ubuntu, Type should be “Linux” and Version “Ubuntu” as shown. Depending on whether you’ve chosen 32 or 64-bit ISOs in step 1, you’ll need to select the right option in “Version” as well. We’ve downloaded a 64-bit ISO so Version is “Ubuntu (64-bit)”.
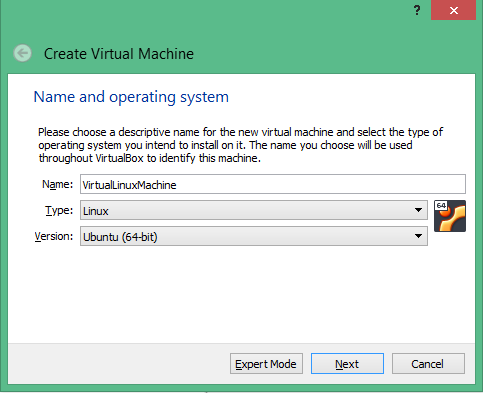
Choosing a virtual machine name in VirtualBox
Setting up VM name.
- Next, we’ll specify how much of our computer’s RAM will be allocated to the VM. Bear in mind we need at least 1GB and on average 2GB+ RAM for our host system to work, so the general rule is always to allocate less than one and a half times the total system RAM we have to our VM. Unless your host PC has less than 4GB of RAM, we’d recommend choosing 1GB of RAM. You can always change this later in the settings should you need to.
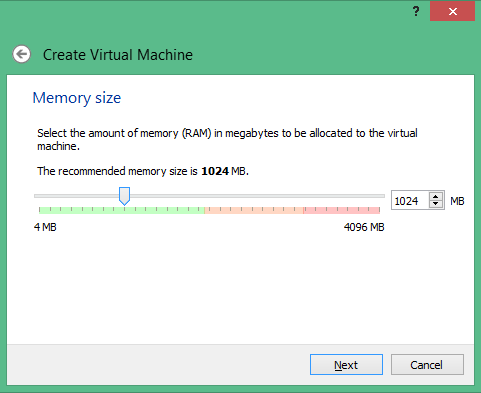
Choosing a virtual machine RAM amount in VirtualBox
Choosing RAM allocation.
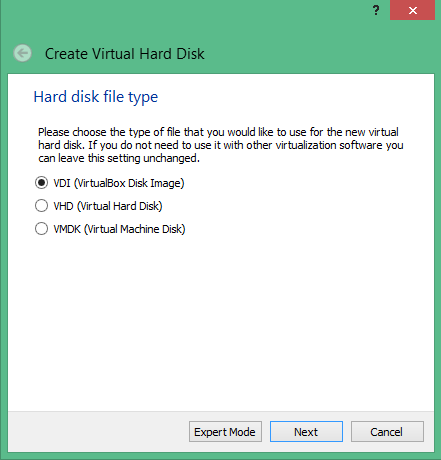
- Now for the interesting part; hard drive setup. Once again, the magic of VMs is that the hard drive “seen” by the VM is in fact just a file on your host PC. Any files we create on the VM will stay within this hard disk file. 8GB is fine if you’re using it to test. Choose 10GB or more if you’d like to install lots of extra programs. We’ll click “create a virtual hard disk” and adjust the size as mentioned. Be generous now as it’s tough to resize disks later.


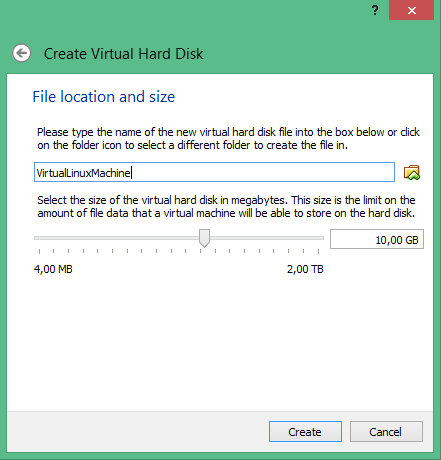
Choosing a virtual machine hard disk size in VirtualBox
Choosing hard disk allocation.
- Click “create” and we’ve created a VM configuration. However, this is the equivalent of a blank computer without any data on it, so we’ll need to tweak a few more settings by choosing the orange “Settings” wrench icon.
- System settings let you control exactly which parts of your hosts hardware are available to the guest, and also how they are visible. To make sure the system will boot, check “Enable I/O APIC” in the “Motherboard” tab of the “System” settings.
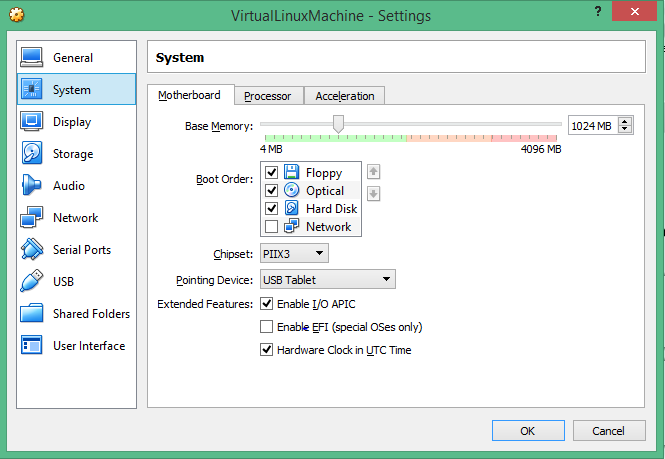
Choosing a virtual machine setting in VirtualBox
Choosing system options.
- Also, we’ll choose “Enable PAE/NX” in the “Processor’ tab, and drag the “Processor” slider to the right to determine how many CPU cores the VM will get to “see” and use from your host machine. If your slider maxes out at “2 CPUs” leave the slider set to 1. If it’s max is “4 CPUs” or “8 CPUs”, move the slider to 2 or 3 respectively.
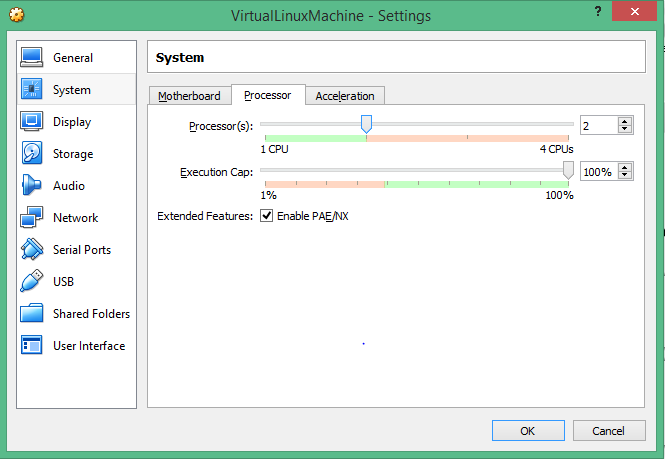
Choosing a virtual CPU core setting in VirtualBox
Choosing CPU core allocation.
- Importantly, we choose “Enable VT-x/AMD-V” in the Acceleration tab. This makes sure the virtualisation support in hardware from Intel or AMD CPUs is used. If this isn’t checked some VMs won’t boot. Ubuntu is forgiving with VT-x support though, so if the option is greyed out it’s likely not supported by your CPU or may be disabled in the BIOS, but Ubuntu will probably still boot.
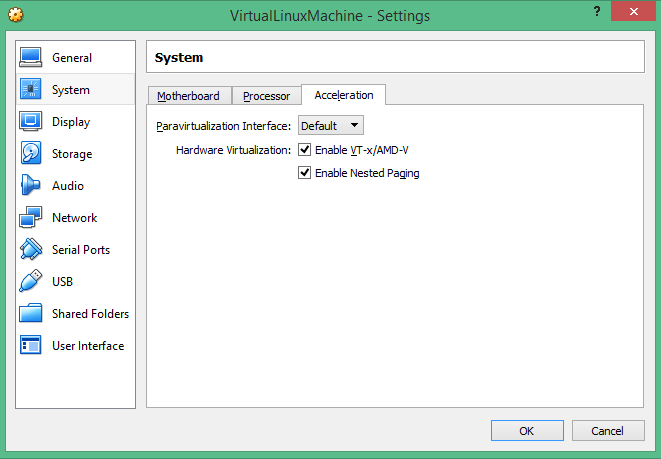
Choosing a virtual machine VT-x setting in VirtualBox
Enabling VT-x support.
- Finally, for 3D graphics support, we’ll choose Display, drag the “Video Memory” slider to the far right and select “Enable 3D acceleration”. This allows the VM to make use of the hardware acceleration (read: graphics processing) abilities of the host. This works even if your PC doesn’t have a dedicated graphics chip.
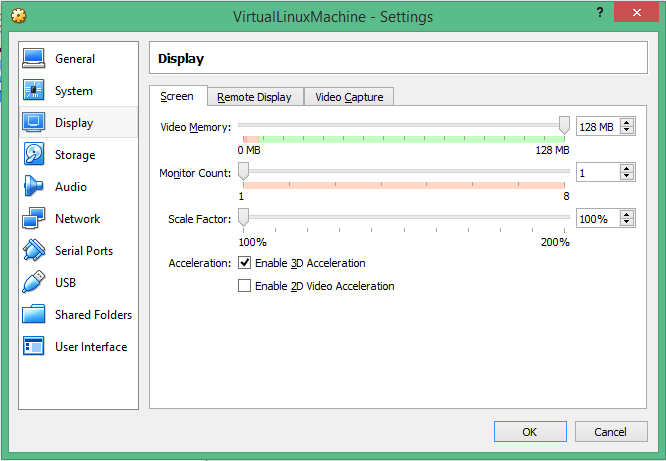
Choosing a virtual machine GPU setting in VirtualBox
Choosing graphics memory allocation.
- To be able to boot and start installing on our new blank Ubuntu VM, we’ll need to tell VirtualBox to mount and use the downloaded Ubuntu ISO as an attached CD. For this, choose Storage and use the plus sign to create a new controller in either the SATA or the IDE columns. Now we’ll choose the disc image by pointing VirtualBox to its location. Once it’s mounted, the virtualiser instructs the VM into installing from the CD.
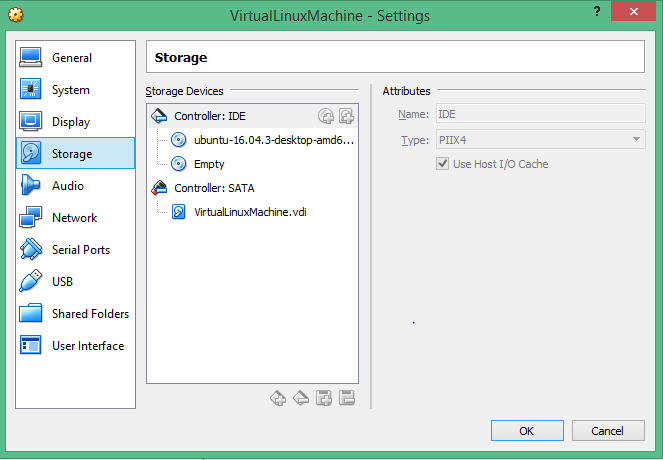
Choosing a virtual machine virtual CD setting in VirtualBox
Choosing the virtual CD ROM file for the Ubuntu installation.
- Once the CD is mounted, we’ll fire up the VM by choosing “Start” and follow the usual process to install Ubuntu. Click here to check out our Ubuntu installation guide. This time, we can easily minimize it and do some Windows work in the meanwhile.
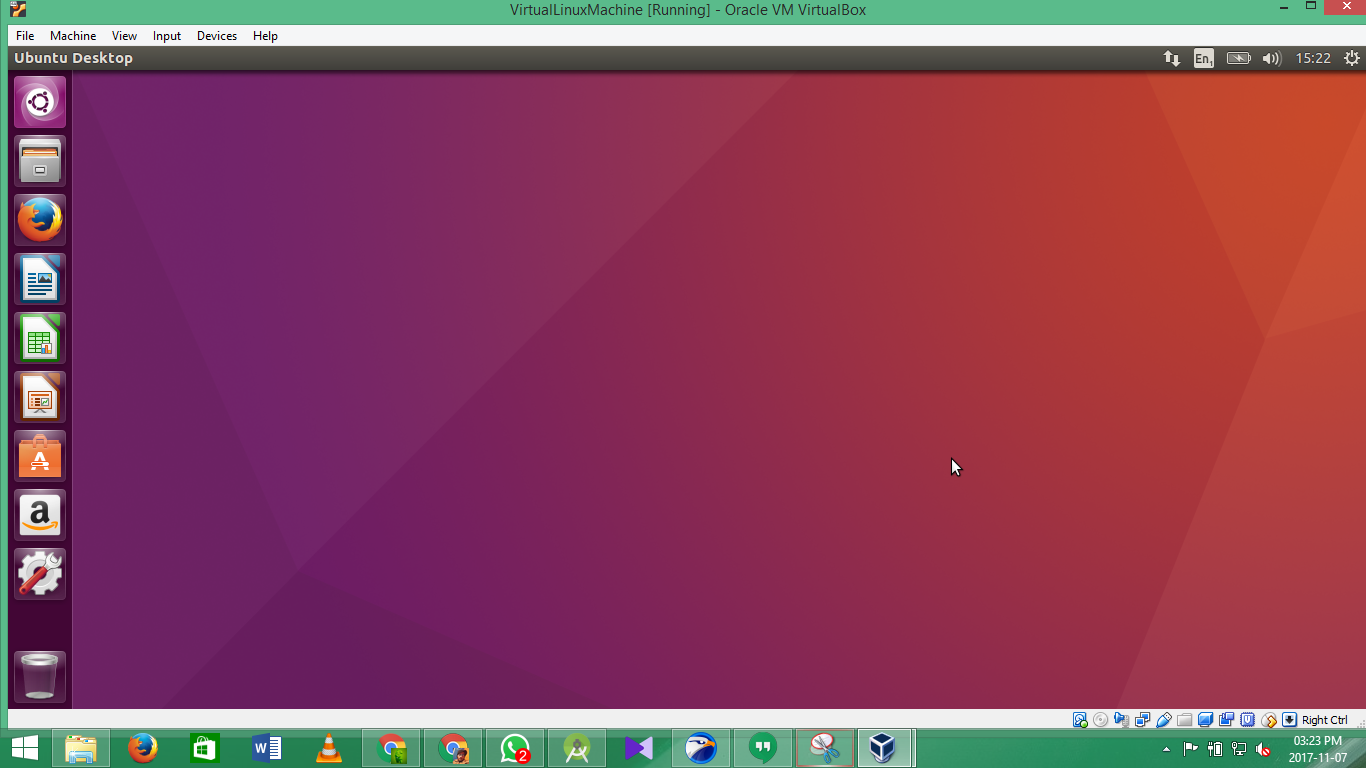
- Once it’s done, you’ll be asked to reboot to complete installation, and you’ll see the Ubuntu VM launch, running as an application window inside of Windows:
- When the OS install is complete, you’ll probably notice the resolution being quite low and other problems with missing drivers. To solve this, whilst the VM is running after installation, click the “Devices” menu and choose the option to “Insert Guest Additions CD Image”. This will auto-mount utilities which you can install which, on reboot, will fix the resolution and other issues found without device drivers in place.
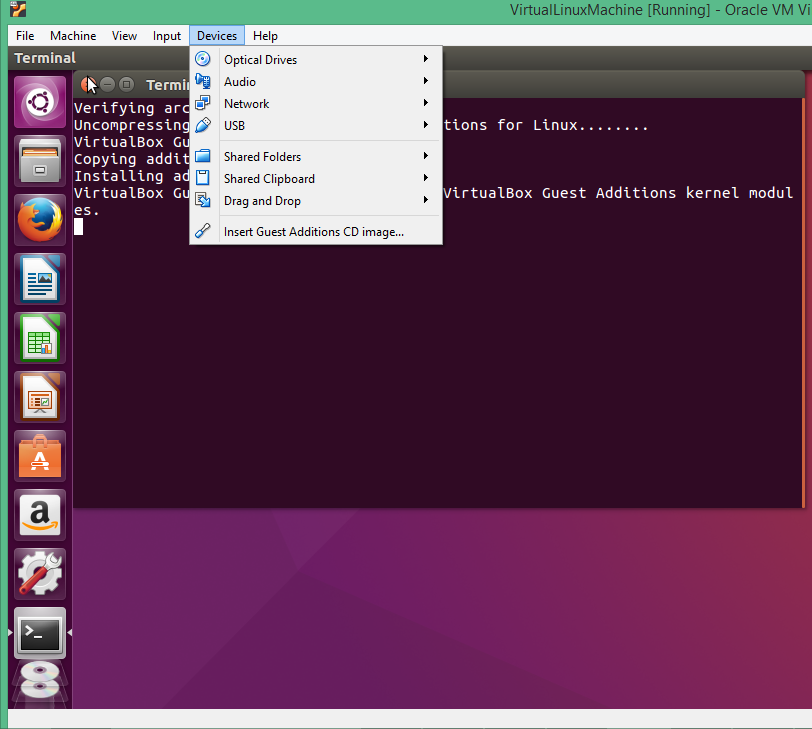
Installing VirtualBox Guest additions on Ubuntu
Use this command to install Guest Additions. (liberiangeek.com)
You’ve successfully set up an Ubuntu virtual machine, and our VM should now be ready for use, to use as you would a native installation of Ubuntu. Don’t forget that when ending your VM session, choose “Shut Down”, as this only closes the VM instance and won’t shut down your host OS.
Have you gotten to using Ubuntu in a VM? How do you find the concept? Comment with your views on this article in the comments section below, and follow Hyperion Hub developments in the future if you’d like to see more articles like these for the South African market.